You can add slicers to your presentation by dragging existing slicers from the Content panel onto the slide, or by creating new slicers on the fly. There are two methods for building your own slicers in Present:
- Create a new "quick" slicer from the slide toolbox.
- Build an advanced slicer from the dedicated wizard.
This affords a lot of flexibility, as you don't need to plan ahead by building slicers in Discover; instead, you can build slicers as you need them while building your presentation. This also gives presentation-builders the ability to create slicers rather than relying on report-builders to create and share them.
Building a New Slicer
- Click Add New Slicer in the Toolbox.
- In the New Slicer pop up, select the required data model in the Choose Model panel. This is the model containing the member hierarchy you intend to use as your slicer.
- From the Choose Data panel, select the hierarchy you want to use; the given hierarchy will immediately appear on the current slide.
Note: The slicer and its target should typically be selected from the same data model. Otherwise, Pyramid may not know how to map the elements between the two models and may show an error at runtime. If the slicer and the target come from different data models, you may configure a model mapping to create a viable interaction between them. For more information, see Model Mapping in Present Pro.
Step 1: Add a New Slicer
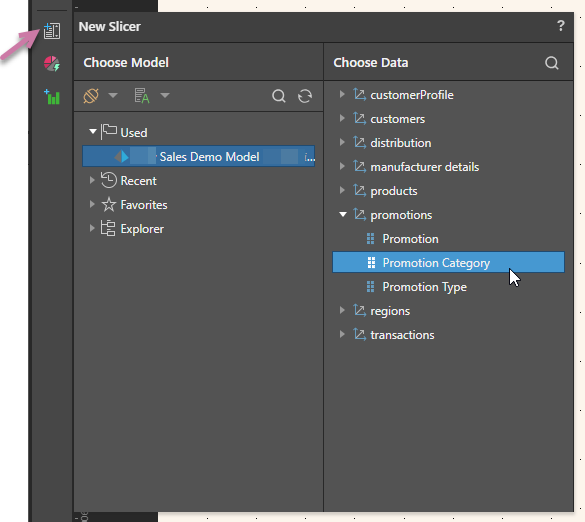
Open the New Slicer menu by clicking Add New Slicer (purple arrow below) and then selecting the model and data the slicer should present:
- From the Choose Model panel, select the relevant data model.
- From the Choose Data panel, open the relevant dimension and select the hierarchy that should be used as a slicer.
Step 2: Interactions
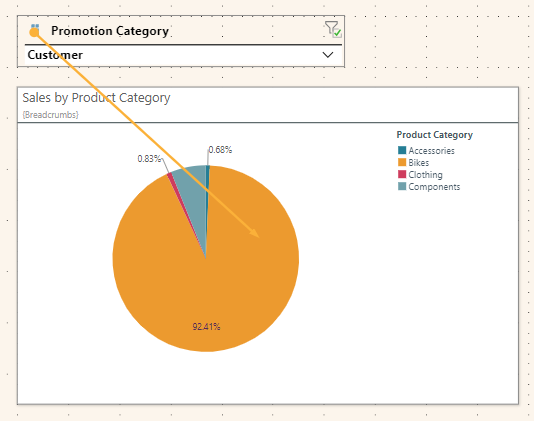
Ensure the slicer has an outgoing interaction to any visuals, slicers, or other content items that should be filtered by it.
- Click here for more information about interactions
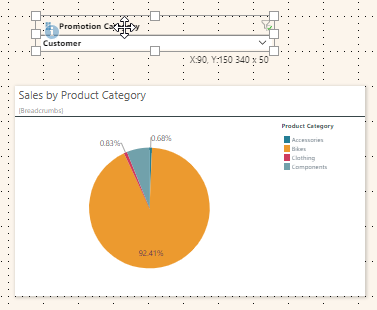
Step 3: Positioning the Slicer
Use drag and drop to position the slicer as required:
- Click here for more information about editing your content items on the canvas
Step 4: Test your Slicer (Runtime)
Launch the presentation at runtime (F2) to use the slicer. Visuals filtered by the slicer display the currently selected slicer elements in the breadcrumb trail (purple arrow):
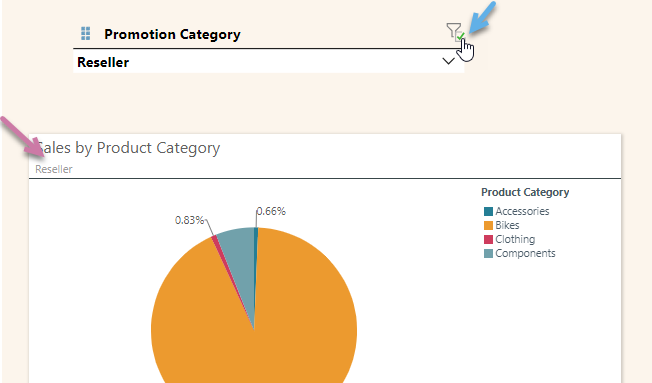
Tip: You could disable the slicer completely (unfiltering the content in the visual) by clearing the filter checkbox (blue arrow).